RiskyProject for Microsoft® Project
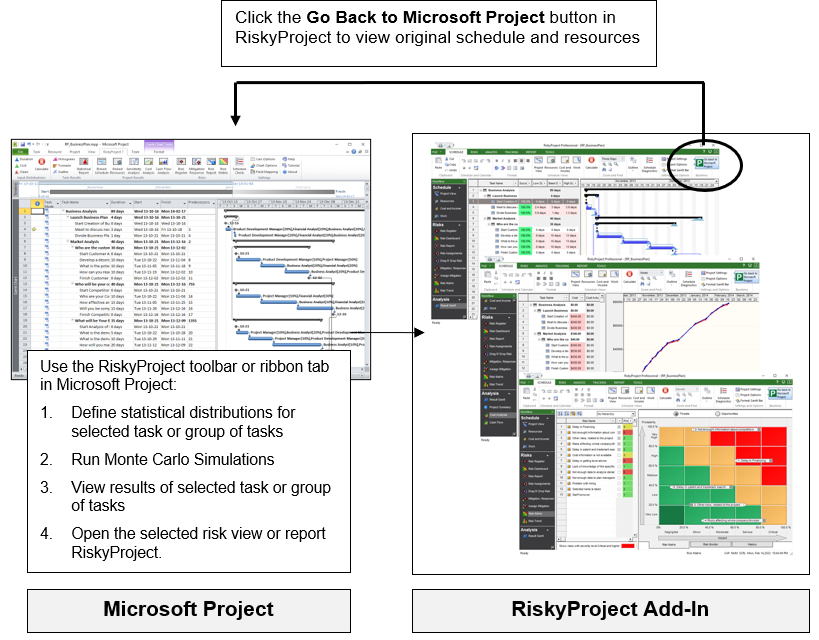
RiskyProject seamlessly integrates with all versions of Microsoft Project from 2010 and higher. When you install RiskyProject, it checks if Microsoft Project is installed on the computer. If Microsoft Project 2010 or higher is found, RiskyProject installs a ribbon and Add-In to Microsoft Project.
Here is how the integration works:
- Create a schedule in Microsoft Project
- Define statistical distributions for cost and duration of for selected tasks inside Microsoft Project; all statistical distributions are saved in RiskyProject file.
- Add risk-related information in the RiskyProject views if necessary: risk events, probabilistic and conditional branching, probabilistic calendars, etc.
- Perform Monte Carlo simulations
- View results of analysis and reports in Microsoft Project
Using Microsoft Project Add-In
Using the RiskyProject Add-In you can quickly add Low and High estimates for Cost and Schedule directly to your Microsoft Project file, run the simulation, and view the results of the analysis.

Setting up the Add-In options
You can set up your Monte Carlo calculation, chart, and field mapping options using the Add-In.
- Calculation options include the maximum number of iterations and convergence monitoring and more.
- Chart options allow you define the appearance of the charts.
- Field mappings allow you to modify the default fields where the distributions for duration and cost are saved.
Adding Low and High Duration or Cost in Microsoft Project
- Select one or more activities.
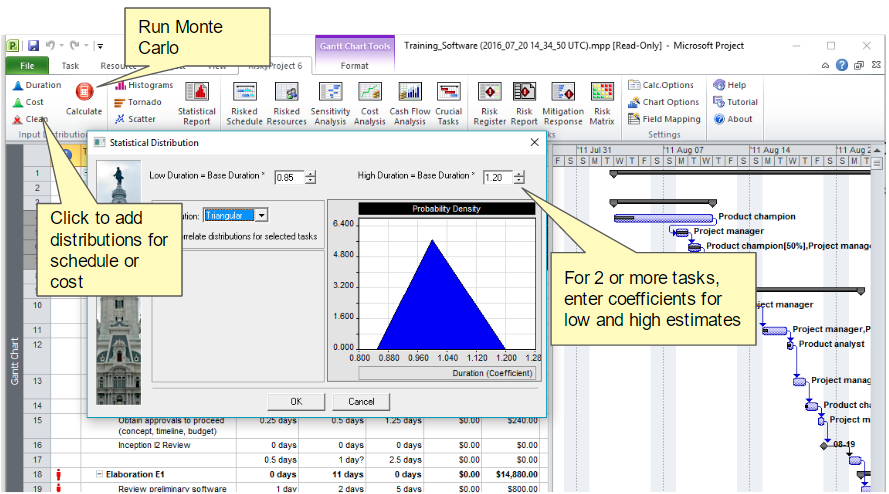
- Click the RiskyProject tab. On the Input Distributions group, click Duration or Cost. The Statistical Distribution dialog box opens.
- Enter in the Low and High estimates using coefficients or fixed values (single activity).
- Select a distribution and modify any parameters required by the distribution.
- Click OK.

Run a Monte Carlo simulation using the Microsoft Project Add-In
Once you have added low and high estimates and distributions to your activities, you can run a simulation
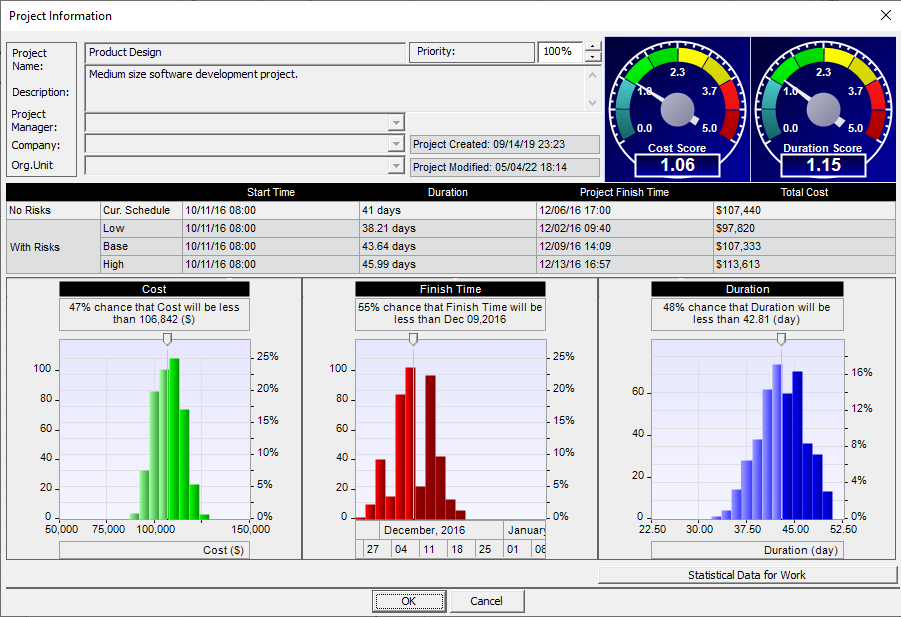
When the simulations are completed the Project Information report opens, which containing a project summary of the results of the simulation.

View a histogram or tornado chart for a single task:
- Click the RiskyProject tab. On the Task Results group, click Histograms or Tornado. The Task Simulation Results report or Tornado Diagram opens.
- Double-click on any of the reports to open a detailed view of the results.
Create a statistics report
You can automatically generate a report that includes a histogram, cumulative probability, and sensitivity analysis for one or multiple activities using the Statistics Report.


